Drawing For Kids is a flexible and pleasant type of imaginative articulation that permits people to rejuvenate their inventiveness on paper. Whether you're a hopeful craftsman or just hoping to further develop your drawing abilities, figuring out how to draw regular items is an extraordinary method for beginning. In this bit by bit guide, we'll investigate how to draw a teapot, an exemplary item that can show you basic drawing procedures like point of view, concealing, and extent.
Before we plunge into the bit by bit course of drawing a teapot, assemble the vital materials to guarantee a smooth drawing experience:
Drawing Paper: Pick a great drawing paper that suits your favored medium, whether it's pencil, charcoal, or ink.
Pencils: A bunch of graphite pencils with various hardness levels (2H, HB, 2B, 4B, and 6B) will assist you with accomplishing different tones and lines in your drawing.
Eraser: A worked eraser or a plastic eraser will be valuable for rectifying slip-ups and refining subtleties.
Sharpener: Save your pencils sharp for exact lines and concealing.
Ruler: A straight edge is fundamental for drawing precise mathematical shapes and lines.
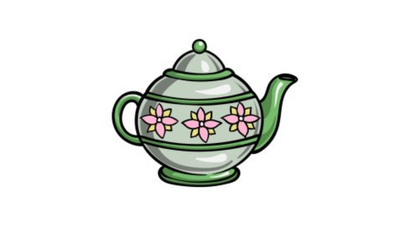
Reference Picture: Find an unmistakable picture of a teapot that you like. You can utilize a photograph or draw from a teapot you have at home.
Start by drawing a light and straightforward layout of the teapot's fundamental shape. Begin with the teapot's body, which generally looks like an adjusted, swelling shape. Utilize a gently attracted oval or circle to address this structure. This will be the groundwork of your teapot drawing.
Then, draw the teapot's spout and handle. The spout is normally a prolonged, bended shape that joins to the body of the teapot. The handle is a circle that interfaces with the body on the contrary side from the spout. Focus on the extents and points, guaranteeing they match the reference picture you're utilizing.
Presently, refine the teapot's shape by adding more subtleties. Smooth out the bends and edges to make the teapot look more three-layered. Make changes on a case by case basis to guarantee your teapot intently looks like the reference picture. Eradicate any pointless lines from the underlying portrayal.
Draw the cover of the teapot, which is generally a half-circle shape. It ought to fit cozily on top of the teapot's body. Focus on the top's size and arrangement comparative with the teapot's body.
The foundation of the teapot is where it sits on a surface. Draw a straightforward circle or oval shape under the teapot's body to make the base. Guarantee that it's appropriately focused and balanced.
Refine the spout and handle by adding more detail and aspect. Ensure they look three-layered and have profundity. Use concealing to make shadows and features on these parts to give them a practical appearance.
Draw any subtleties on the cover, like a handle or handle. These subtleties might fluctuate relying upon the style of teapot you're drawing. Focus on the reference picture to precisely catch these elements.
On the highest point of the teapot, draw the initial where tea is poured. This is regularly a round or oval shape, contingent upon the teapot's plan. Guarantee it's put accurately on the cover.
Concealing is significant for giving your teapot a practical and three-layered look. Begin by distinguishing the light source in your drawing. Conceal the regions that would be in shadow, like the lower part of the teapot, within the spout, and the regions around the handle and top. Utilize different pencil grades to accomplish different tones and surfaces.
Keep on refining your drawing by adding unpretentious subtleties, similar to the surface of the teapot's surface or any enlivening components it might have. Focus on the better elements and guarantee that your concealing upgrades the general authenticity of the drawing.
Make a stride back and evaluate your teapot drawing. Make any last acclimations to extents, concealing, or subtleties to guarantee it matches your reference picture and looks outwardly satisfying. Don't hesitate for even a moment to make essential rectifications with your eraser or add extra concealing to work on the profundity.
That will finish you off of this aide on the best way to draw a teapot. We trust that planning your own special teapot was a tomfoolery and pleasant experience for you to partake in!
By following the means we have spread out for yourself and moving slowly, you will know all that you want to be familiar with drawing an exquisite teapot.
At the point when you have dominated this drawing, you can then communicate your inventiveness by switching around the subtleties, adding some foundation components or utilizing a few delightful varieties.
This is your opportunity to truly flaunt what you can do, so have a great time communicating your innovativeness!
You can then visit our site when you're prepared for your next drawing challenge. We have lots of advisers for appreciate, and we have a lot more on the way soon. Continue to register to ensure you won't ever pass up a major opportunity!
Drawing a teapot is a magnificent activity for craftsmen of all expertise levels, as it joins essential mathematical shapes with additional perplexing subtleties. Following this bit-by-bit guide and rehearsing routinely, you can foster your drawing abilities and gain a superior comprehension of point of view, concealing, and extent. Recollect that drawing is self-articulation, so add your touch to every teapot you make. With persistence and practice, you can draw teapots and different articles with certainty and imagination. This way, get your pencils, find a teapot that rouses you, and begin drawing!
For more information, please Click Here!